- Published on
3 Things I Learned From Building a ChatGPT Clone
- Authors

- Name
- Ryan Griego
Introduction
As developers, we don’t always need to understand the way every technology works under the hood. With our command over APIs, we can make use of large language models from OpenAI in our own projects. I chose to build a side project that would end up being a tool I can use in my workflow. With the assistance of a course on Udemy and ChatGPT itself, I put together a ChatGPT clone. I will be sharing a few things that I learned while working on this. I cover the benefits of using the OpenAI API vs. using the ChatGPT web app, how edge functions are used to provide real-time interaction with the LLM, and how user authentication (Auth0) was used.
Benefits of Using the OpenAI API
Instead of paying a monthly fee to OpenAI. By making this app, I can pre-purchase credits from OpenAI and only pay for what I use. Additionally, by using the OpenAI API and not the ChatGPT web app, the user can benefit from not having their prompts and answers being stored and used by OpenAI.
By using the API, OpenAI does not store the content of requests and responses, giving the user more control over how the data is handled.
By building your own clone, you can “pre-prompt” the application itself and let it know how it should behave.
    const initialChatMessage = {
      role: "system",
      content: "Your name is Chat RRG. An incredibly intelligent and quick-thinking AI, that always replies with an enthusiastic and positive energy. You were created by Ryan Griego. Your response must be formatted as markdown."
    };
For a markdown file, the default image tag can be used and the default img tag gets replaced by the Image component in the build process.
You can see that the responses will have a name, a response style, an author and a requirement that the response be formatted in markdown.
Edge Functions
When it comes to integrating OpenAI API, I’m using the openai-edge-stream package to make a POST request that streams responses from OpenAI API. This real-time streaming improves the user experience by reducing wait time for responses. Instead of waiting for the whole response to be returned, it sends back the response as it’s generated.
In this function, I can change the model depending on what I want to use. Before the stream occurs, we check if the prompt is coming from a new chat or an existing one. After the stream runs, we add the new message to our chats database.
Edge functions solves the issue that happens when the server that’s hosting the OpenAI endpoints is located far from the user hitting those endpoints. Edge functions essentially act as a CDN with cached versions, hitting the closest location where the request is made.
The big downside to using these types of functions is that they do not run in a Node.js environment, which cannot handle a distributed cache for functions to run globally. We’re thereby unable to connect to most databases from within a Node function. We need to create a separate non-serverless endpoint with a physical location, which may or may not be near the user. In addition, the database may not be hosted near this endpoint so it’s best to host the serverless function in the same location as the MongoDB database.
We cannot connect directly to MongoDB with an edge function; however, we can create a separate serverless function that will run the Node.js runtime because it won’t be an edge function, and we can call that endpoint from within our edge function.
I don’t understand how all this stuff works under the hood. This is more of a high-level explanation of serverless functions. As developers, we don’t need to understand how everything works under-the-hood, we just need to understand at a high level how things work. We can then make our design and architecture decisions based on this high level understanding.
    const stream = await OpenAIEdgeStream("https://api.openai.com/v1/chat/completions"
    ,{
     headers: {
      'content-type': 'application/json',
      Authorization: `Bearer ${process.env.OPENAI_API_KEY}`,
     },
     method: "POST",
     body: JSON.stringify({
       model: "GPT-4o",
       //model: "gpt-4-0125-preview",
       // model: gpt-3.5-turbo
        messages: [initialChatMessage, ...messagesToInclude, {content: message, role: "user"}],
        stream: true,
     }),
    }, {
      onBeforeStream: ({emit}) => {
        if(newChatId) {
          emit(newChatId, "newChatId");
        }

      },
      onAfterStream: async ({fullContent}) => {
        await fetch(`${req.headers.get("origin")}/api/chat/addMessageToChat`, {
          method: "POST",
          headers: {
            "content-type": "application/json",
            cookie: req.headers.get("cookie"),
          },
          body: JSON.stringify({
            chatId,
            role: "assistant",
            content: fullContent,
          })
        })
      }
    });
     return new Response(stream);
  } catch(e) {
    return new Response({message: "An error occured in sendMessage"},
      {
        status: 500,
      }
    )
  }
}
In this function, I can change the model depending on what I want to use. Before the stream occurs, we check if the prompt is coming from a new chat or an existing one. After the stream runs, we add the new message to our chats database.
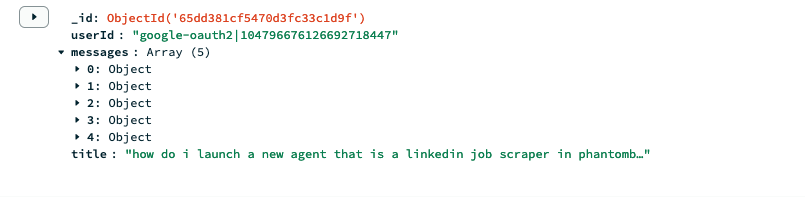
ObjectId is a class from the MongoDB library that generates a unique identifier for each document in the collection.
Auth0 for User Authentication
To set up my Auth0 account, I went to auth0.com and created a new application. With the new application, we need to add the values we receive into our .env.local file.
Next, API routes need to be set up in the API directory. The API directory is a special directory that Next.JS utilizes for API routes. The API endpoints will allow us to login, signup and logout.
Auth0 has a built-in function that will set up these endpoints for us. If we use the Next Link component we can use /ai/auth/login to bring us to the login page. We still need to setup state values so our application knows what to render based on the status of the user being logged in or logged out. If the user is already logged in, we set up a redirect to the /chat page.
Next.JS has a built-in function that runs when a page is requested. With this function, we check the logged in status of the user and redirect to the /chat page if the user is already logged in.
export const getServerSideProps = async (ctx) => {
  const session = await getSession(ctx.req, ctx.res);
  if(!!session) {
    return {
      redirect: {
        destination: "/chat",
      },
    }
  }
Conclusion
There were a number of topics I learned about from doing this project. One of them being the integration of OpenAI’s API and how it differs from using the ChatGPT web app. The integration required the use of edge functions which brings in the power of real-time processing and improves the speed at which the user and the LLM communicate. I also learned how to make use of Auth0 to provide users a secure way to sign and login to the app.
Thank you for reading! I hope this post helps empower you to make use of LLM's in your own projects. I recommend checking out the Udemy course linked below if you want to learn more about building a ChatGPT clone.
Below are some sources that were used to help this app come to life.